So after the relative success of the bound button holes (
progress report 2) it was on to interfacing.
The pattern just called for the facings to be interfaced but following the 'couture' methods described in the
Clare Schaeffer book and the
Vogue book called for significantly more.
Now, my run ins with interfacing to date have been solely of the fusible variety. Cut it out, put it on reverse of fabric and hold hot iron on it for a few seconds. Job done. The Winter Coat though I decided deserved something better so 3 metres of tailoring canvas hair interfacing was acquired and I set to work. (I should probably confess at this stage to ordering the canvas hair online from
here - not that there is anything wrong with ordering from Rascol - in fact I use them a lot as our house is not very conveniently positioned for fabric or haberdashery shopping - but mainly because I really didn't know what canvas hair looked or felt like and I knew that if I tried to go and buy it somewhere I would be presented with a range of options and made to choose which I needed which is not easy when you don't know!)
Reports vary as to where you should interface (all or just part of your front and back sections) but as the fabric that I am using is quite supple I decided that I would completely interface the front sections and that I would sew a back stay onto the back section (see below for further details on the back stay). My reasoning behind this was that the front sections get more wear and tear than the back and the "look" I am going for on the front of the coat is a slightly more stiffer look than is currently the case with the drape of the fabric.
Despite extensive research in my books and on the internet I struggled to find anything that particularly dealt with interfacing a coat with an extended front facing (You can see from the photo below that the pattern I am using has the facing section attached to the front section and it will then just fold back rather than a separate facing which you would then sew to the front section of the coat - does that make sense?).
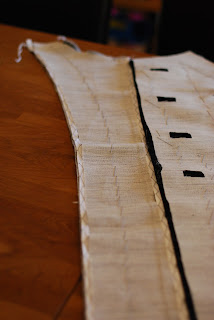 |
| Extended facing on front section of coat |
There are lots of articles and tutorials dealing with jackets and coats with lapels and so in the end, as with the interlining (blogged about here) I had to come up with my own solution. Basically the interfacing should be cut out of the sale pattern pieces as the fabric and then they are basted together. I decided though to interface the front section of the coat as one section and then the facing section as a separate section so using two pieces of interfacing and leaving a gap where the facing will fold over so as not to add bulk there.
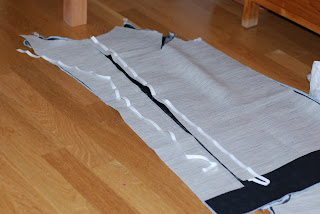 |
| Interfacing front section and facing section separately |
I cut off the hem allowance so as not to double up the canvas hair in the hem and then interfaced the hem section with a lighter fusible interfacing. In order to attach the canvas hair I drew chalk lines approximately 3 cm apart vertically and I diagonally basted it to the interlining. (Gertie basted her canvas hair with more straight lines and I doubt it really matters (please read that in hushed tones as I imagine it is not the sort of thing you should say when talking about "couture") - I just liked the diagram in the Vogue book showing the diagonal basting. The book also says that diagonal basting is the same as padstitching just on a bigger scale so I also thought it would be good practice!)
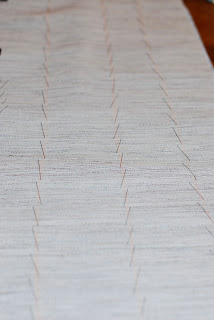 |
| diagonal basting to attach interfacing |
You don't need to baste into the seam allowances and I cut out the interfacing round the bust darts and pulled the fabric through so it could be catch-stitched to the interfacing
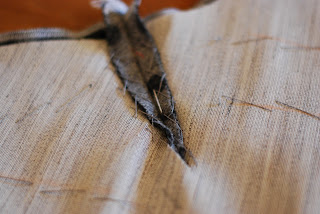 |
| cut interfacing round dart and catch stitch fabric to interfacing |
And, finally, in relation to interfacing the front sections I cut out holes in the interfacing behind the bound button holes.
Onto the back section.
As I said above I decided to apply a back stay to the back section. This effectively means interfacing the top part of the back section from the neckline to about 10 cm below the arm holes. I cut the interfacing out using the back pattern piece and then drew a curved line, going up slightly in the middle, from a point approximately 10cm below each arm hole to the other side.
For the back stay I followed Gertie's lead and machine sewed it to the fabric just within the seam allowance all the way round from one side, up the arm hole, across the neckline, down the other armhole and down the side.
Then, just when I thought I was done with the interfacing for the front and back sections I turned the page in the Vogue book and read about tailor padding. This is effectively an addition layer of interfacing with a layer of flannel below (sandwiched between the two layers of interfacing) that goes round the armhole sections as shown below to provide extra support in this area. The tailor padding should not extend into the seam allowances and is diagonally basted to the underlying layer of interfacing as before.
 |
| tailor padding on front section |
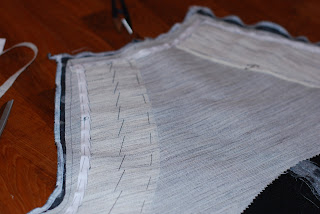 |
| tailor padding on back section |
Finally, for the front and back sections I applied twill tape to the neck line and armholes and the fold line where the facing will fold over on the front sections. I catch stitched the tape by placing it just on the seam lines, in relation to the neck and armholes with the rest of the tape on the actual garment side of the seam line (rather than in the seam allowance), and by placing it just inside the fold line on the front section, rather than on the facing section. I also placed a line of twill tape on the edge of the facing section so that this section will not sag.
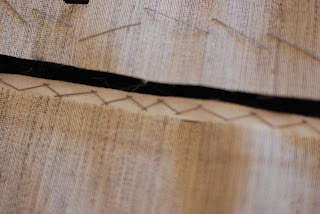 |
| twill tape catch-stitched |
 |
| twill tape applied round neckline and arm holes |
 |
| twill tape on fold line and outer edge of front facing |
Next I am interfacing the sleeves and then it is the moment of truth as I can finally start to sew the pieces together and see if they look like an actual coat!
I realise that I am running almost a week behind with my weekly progress reports but hopefully that will be rectified this weekend by me posting the next instalment - stay tuned - oh and don't forget to have a look at my advent calendar!!
