
But, before you get excited and tricked into thinking that you are shortly to see my bound buttonhole effort I thought I would expand a little on the interlining. You may remember that I wanted to interline my coat for added warmth and cosiness and that last week I had basted the interlining to the coat fabric.
I added that as a somewhat cool throw away comment in the last progress report but thought I should actually fill you in on a fairly banal step in my coat making but which actually caused me the most angst so far. You see my main problem was that once I had decided to interline my coat I looked up in the Vogue book and in Claire Schaeffer's book what I was to do with it. Claire Schaeffer was the least help - it not featuring at all (but then her book, in fairness, doesn't really deal with coats). Vogue stipulated that the interlining should be cut out with the lining and basted to the lining pieces. I should probably have stopped there and followed their advice but I was worried that this would add weight to the lining and make it sag and I thought I would just check what other on-line sources had to add.
At this point I came across this article and also this article both of which were firm proponents of basting the interlining to the fashion fabric (in other words your outer coat fabric) and then continuing as if they were one.
After much debating (with myself) I decided to go with the Threads advice - and I basted the interlining to the fashion fabric - in the same way as if it were an underlining (which, if you are as ignorant about these things as I was until last week, is an extra layer that you add between the fashion fabric and the lining to add stability, structure and to deal with any transparency issues - and you cut it out of the same pieces as the outer garment and baste it to the fashion fabric and then continue as if they were one).
I couldn't find anywhere particularly helpful in terms of exactly how to baste the interlining to the fabric so took the techniques in the Vogue book described for underlining and adapted them as I thought fit (yes, in other words I went out on my own here!).
Firstly I cut the interlining from the same pieces as the main coat pieces, but not the facings and then laid them on the fabric and cut away the hem allowance as I don't need interlining doubled up in the hem. I then basted round with a running stitch in the seam allowances to keep it in place. Once the seams are sewn I will cut it away in the seam allowances so that there is not too much bulk. Along the edges where there isn't a seam allowance I used a herringbone stitch to catch it to the fabric.
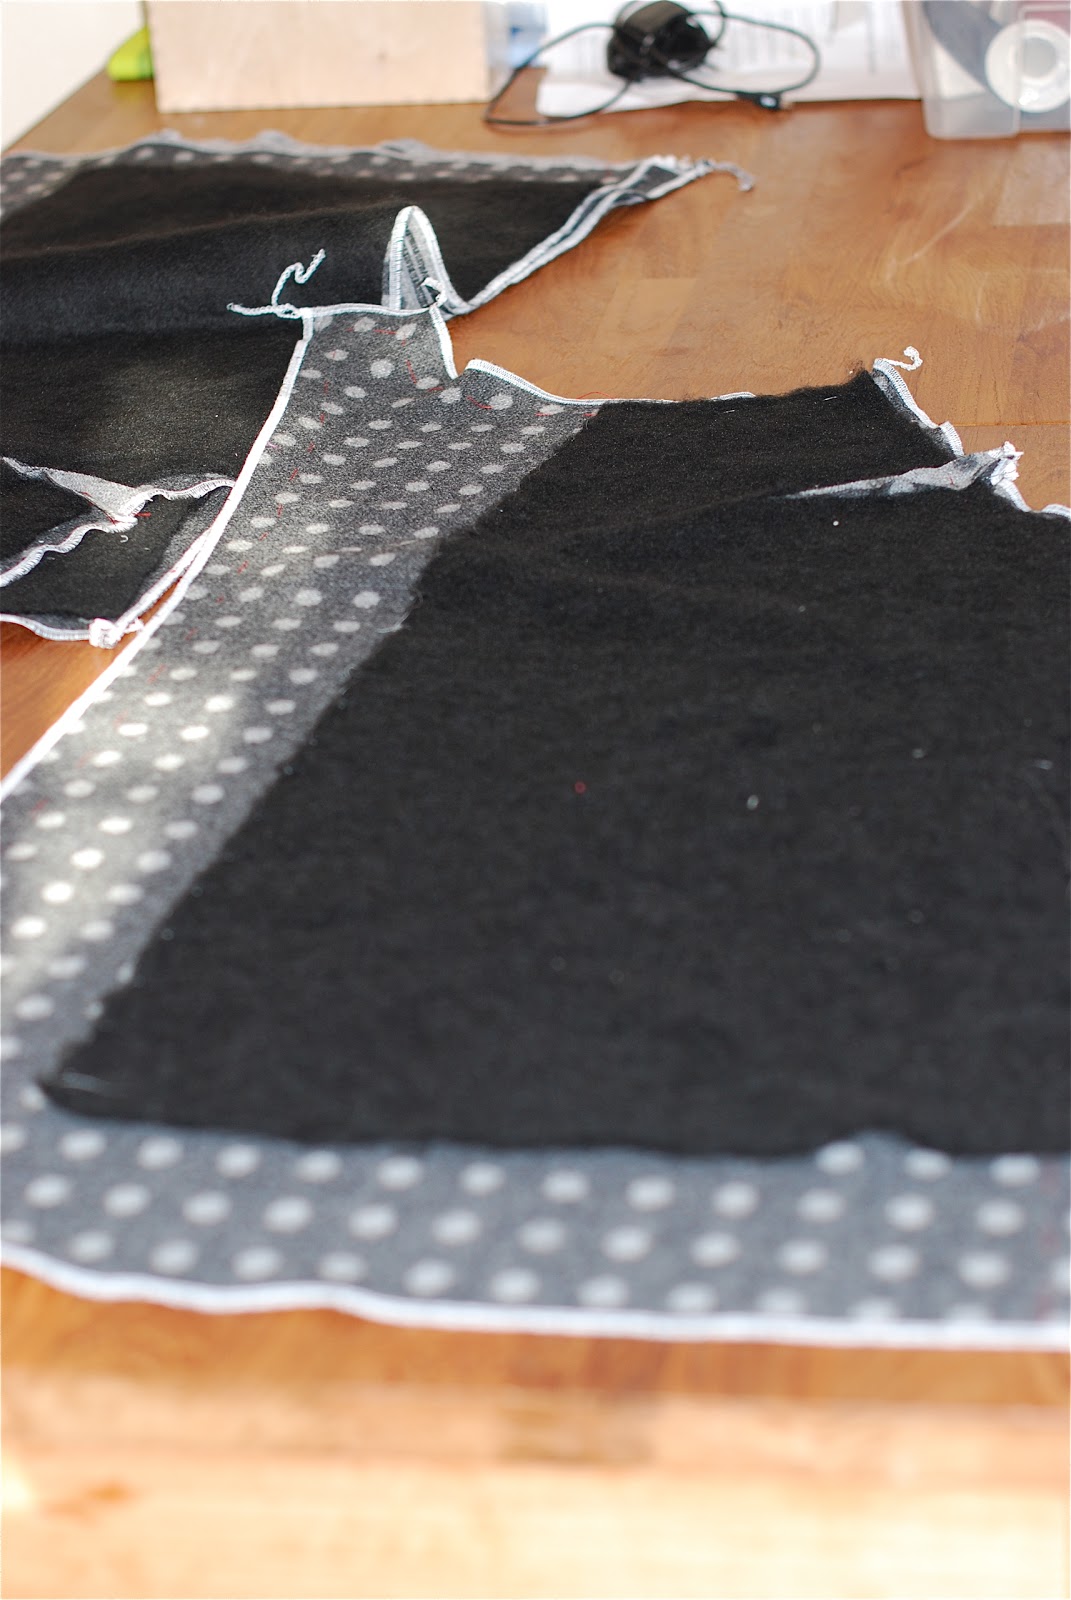 |
| interlining on fabric with facing and hem allowance cut away |
 |
| interlining basted onto my fabric - using the herringbone stitch |
I also cut away the interlining around the darts and cut the darts open so that they lie flat, as shown below.
 |
| interlining cut round darts |
So there you have the synopsis of the interlining dilemma. Next up was the bound button holes.
Before ploughing straight in on my actual coat I thought I should try some out on scraps of fabric. I read up in Claire Schaeffer's book and the Vogue book and also looked at Gertie's tutorial for bound button holes. All of them recommend using silk organza in the process which was my hurdle number 1. No silk organza. I did a couple of practice ones with some synthetic organza but, as Kenneth Cole says in one of his articles in Threads - synthetic organza has too much 'sproing' so I decided that I should wait until I could get some silk organza to do the button holes on my actual coat.
It is recommended that you get the organza in a colour close to your fashion fabric. Unfortunately that wasn't possible for me unless I wanted to wait for shipping from a distant country so I went ahead with some ecru coloured organza that I got at an extortionate price in a very lovely but very expensive shop in Carpentras.
Another benefit of doing the practice run button holes (aside from agreeing that synthetic organza has too much sproing) was that I could see whether the interlining that I had already basted to the fashion fabric was going to give me head aches. And, guess what?? yes, I ended up undoing the basting and folding back the interlining so that I could do the bound button holes without including the interlining...one step forward, two steps back!
Anyway, that done it was time to tackle the button holes. I have a thing about button holes. I don't like them. And I'm not just talking about the bound ones. No matter how many practice ones I do I never feel entirely comfortable going into the process on my actual garment. This uneasiness stayed with me throughout the whole process of making the bound button holes (which is significantly longer than just sticking the fabric under your buttonhole foot on the machine and whizzing through the four steps) but I have to say all in all it was not quite as bad as I expected.
Gertie has an excellent tutorial which describes (and shows with photos) each step of the process. I was so intent on getting them done that I didn't take many photos as I was doing them but those that I have shared below give you a rough idea of the steps involved.
 |
| marking the lines on the reverse of the fabric - after attaching fusible interfacing |
 |
| the four button holes marked The next step was to pin a square of silk organza to the front of the fabric and stitch round the square which you then cut into diagonally into each corner and you then push the organza through to the back of the fabric |

 |
| the four button holes seen from the reverse side of the fabric after pushing through the organza |
 |
| the view from the front of the fabric |
 |
| bound buttonholes! |
 |
| close up of the buttonhole |
Next I am permanently basting in the interfacing to the front sections of the coat and applying a back stay to the back sections. I am also debating adding some interfacing to the underarm sections of the sleeves. More on that next time!
Wow! Great post, your coat looks promising.I wish I had the time to practice all those techniques.
ReplyDelete