Tuesday 30 November 2010

Sink.......or make yourself a dress?

What do you do when you are sinking in sewing projects destined for christmas presents with the only dry land in sight being a very steep and slippery, gloomy and imposing rock (the winter coat project)?

That's right - you get your head down working slowly and meticulously through your projects in an ordered and organised fashion.


Yep - you guessed - I tossed reason to the side, pulled out some of this

cotton plaid fabric from Etoffes des Heros

rifled through these to find a suitable pattern


decided on this

Dress E from Japanese Pattern Book - Stylish Dress Book 1

and made myself a dress


I cut a size 9 and followed the pattern directions completely except for omitting one of the pockets and adding some piping at the top of the pocket to give it some definition.

Black piping at top of pocket


After wearing the dress for a day, I basted the pocket closed so that it doesn't gape. (This also means that little hands can't put random things in the pocket which is an added bonus!)

Sewing for others and grown up proper projects are all very well but once in a while a bit of instant gratification is needed!

Thursday 25 November 2010

Easy hair clips

I have posted a tutorial today over on the crafty christmas club blog - click here to have a look and see how to make these (good for advent presents/stocking fillers):


Tuesday 23 November 2010

Winter Coat - Progress Report Week 2

As you may have seen if you stopped by recently I have spent a large part of my sewing time last week working on Christmas presents so I haven't progressed enormously on the winter coat but I did baste it roughly together to check that I liked the buttons and to work out where I wanted them to go. I'm not going to show you a photo of that as, truthfully, I forgot to take one....but it did mean I could start on the bound button holes.

But, before you get excited and tricked into thinking that you are shortly to see my bound buttonhole effort I thought I would expand a little on the interlining. You may remember that I wanted to interline my coat for added warmth and cosiness and that last week I had basted the interlining to the coat fabric.

I added that as a somewhat cool throw away comment in the last progress report but thought  I should actually fill you in on a fairly banal step in my coat making but which actually caused me the most angst so far. You see my main problem was that once I had decided to interline my coat I looked up in the Vogue book and in Claire Schaeffer's book what I was to do with it. Claire Schaeffer was the least help - it not featuring at all (but then her book, in fairness, doesn't really deal with coats). Vogue stipulated that the interlining should be cut out with the lining and basted to the lining pieces. I should probably have stopped there and followed their advice but I was worried that this would add weight to the lining and make it sag and I thought I would just check what other on-line sources had to add.

At this point I came across this article  and also this article both of which were firm proponents of basting the interlining to the fashion fabric (in other words your outer coat fabric) and then continuing as if they were one.

After much debating (with myself) I decided to go with the Threads advice - and I basted the interlining to the fashion fabric - in the same way as if it were an underlining (which, if you are as ignorant about these things as I was until last week, is an extra layer that you add between the fashion fabric and the lining to add stability, structure and to deal with any transparency issues - and you cut it out of the same pieces as the outer garment and baste it to the fashion fabric and then continue as if they were one).

I couldn't find anywhere particularly helpful in terms of exactly how to baste the interlining to the fabric so took the techniques in the Vogue book described for underlining and adapted them as I thought fit (yes, in other words I went out on my own here!).

Firstly I cut the interlining from the same pieces as the main coat pieces, but not the facings and then laid them on the fabric and cut away the hem allowance as I don't need interlining doubled up in the hem. I then basted round with a running stitch in the seam allowances to keep it in place. Once the seams are sewn I will cut it away in the seam allowances so that there is not too much bulk. Along the edges where there isn't a seam allowance I used a herringbone stitch to catch it to the fabric.

interlining on fabric with facing and hem allowance cut away


interlining basted onto my fabric - using the herringbone stitch


I also cut away the interlining around the darts and cut the darts open so that they lie flat, as shown below.


interlining cut round darts


So there you have the synopsis of the interlining dilemma. Next up was the bound button holes.

Before ploughing straight in on my actual coat I thought I should try some out on scraps of fabric. I read up in Claire Schaeffer's book and the Vogue book and also looked at Gertie's tutorial for bound button holes. All of them recommend using silk organza in the process which was my hurdle number 1. No silk organza. I did a couple of practice ones with some synthetic organza but, as Kenneth Cole says in one of his articles in Threads - synthetic organza has too much 'sproing' so I decided that I should wait until I could get some silk organza to do the button holes on my actual coat.

It is recommended that you get the organza in a colour close to your fashion fabric. Unfortunately that wasn't possible for me unless I wanted to wait for shipping from a distant country so I went ahead with some ecru coloured organza that I got at an extortionate price in a very lovely but very expensive shop in Carpentras.

Another benefit of doing the practice run button holes (aside from agreeing that synthetic organza has too much sproing) was that I could see whether the interlining that I had already basted to the fashion fabric was going to give me head aches. And, guess what?? yes, I ended up undoing the basting and folding back the interlining so that I could do the bound button holes without including the interlining...one step forward, two steps back!

Anyway, that done it was time to tackle the button holes. I have a thing about button holes. I don't like them. And I'm not just talking about the bound ones. No matter how many practice ones I do I never feel entirely comfortable going into the process on my actual garment. This uneasiness stayed with me throughout the whole process of making the bound button holes (which is significantly longer than just sticking the fabric under your buttonhole foot on the machine and whizzing through the four steps) but I have to say all in all it was not quite as bad as I expected.

Gertie has an excellent tutorial which describes (and shows with photos) each step of the process. I was so intent on getting them done that I didn't take many photos as I was doing them but those that I have shared below give you a rough idea of the steps involved.

marking the lines on the reverse of the fabric - after attaching fusible interfacing


the four button holes marked

The next step was to pin a square of silk organza to the front of the fabric and stitch round the square which you then cut into diagonally into each corner and you then push the organza through to the back of the fabric


the four button holes seen from the reverse side of the fabric after pushing through the organza

the view from the front of the fabric
 The strips are then attached to the back and voilà!

bound buttonholes!
 I tried to match the pattern of the fabric on the strips so that it didn't look too odd. They are by no means perfect but I don't think they are disastrous either.

close up of the buttonhole


Next I am permanently basting in the interfacing to the front sections of the coat and applying a back stay to the back sections. I am also debating adding some interfacing to the underarm sections of the sleeves. More on that next time!

Saturday 20 November 2010

Project progress

You may remember that I said that I was going to spend this last week working on Christmas projects. Well, for once, I have done as I said.

You have already seen the bunting and I have now nearly finished filling all the pockets. Given that the bunting is heading to a six month old, and, in addition, I have three lots of advent pockets to fill for les mademoiselles et petit garçon I really really didn't want to spend a fortune on little gifts. Many of the gifts are therefore home-made or home adapted and I will do a more crafty post in a few days to show you what I did (craft posts are not normally my thing but seeing as I now I have a glue gun (I know, wow!) I think I am now qualified to do craft posts!)

So, advent is nearly taken care of (well, unless I pay heed to my children begging for bunting like baby 'fia's that is!) and I have also made some head way into the list of things to be done for Christmas. We are going to be spending Christmas with family so that les mlles et petit garçon will be with their cousins. The small females in the family will each receive a corduroy dress:


The dresses aren't completely finished - the smaller, red one need the buttons sewing on and the bigger, violet ones need hemming and the facings hand sewing down.

The red dresses are for a 6 month old and a three year old.


and I used a New Look pattern  for them (pattern number 6578) that my mum kindly donated to me.

The bigger dresses are for a 5 year old, a nearly 7 year old and a nearly 8 year old and are from Simplicity pattern number 3859. Again, thanks Mum! 


Once they are completely finished I will do a more detailed post on the dresses. I tried to ensure that I tried something new or slightly different on each of them but more on that later.

As regards other Christmas presents, fabrics are chosen and are currently being pre-shrunk and I hope to have patterns chosen in the next couple of days.

I have also done (a little) work on my winter coat. The weekly progress report on that will be up tomorrow.


Bon weekend!

Wednesday 17 November 2010

Tiered cord skirt

I made this skirt a couple of weeks ago as Mademoiselle L apparently had nothing to wear to a party she was invited to.

The pattern is home-made  - three gathered tiers and a simple elasticated waist. But it does twirl - a necessity for 'party skirts'.

I didn't manage to get any photos of her dolled up for the party (that's what happens when you are still hemming 5 minutes before she is due to be there!) but I did get some the next time she wore it.

Party skirts are also, apparently, good for hiking!!

Tuesday 16 November 2010

Stars for Bik-Nok

BikNok is a non profit organisation set up by two sisters to raise money for children in difficulty. They created the concept of 'Petite Couture - Grands Projets' where by home sewers/crafters/knitters can exhibit items they have made and they are offered for sale, with all the proceeds going towards the project chosen for that particular sale (the creators donate the items). I think there are a couple of sales organised a year and each one has a theme and a chosen project towards which the proceeds will be donated.

The theme for the sale that will start on Sunday 21 November is 'star' and the proceeds will go towards Solidarity International and, in particular, their aim to supply drinking water to children in Pakistan.

You can see more information on the BikNok site including details of how to upload a project if you fancy donating something and, even better, how to purchase items if you are looking for Christmas presents or a starry item for yourself!

Here you can see the skirt I have donated.

front view

A cotton skirt with elasticated back and drawstring front and rick rack round the bottom.


back view


perfect for twirling!

Advent bunting

I have a niece who is about to experience her first christmas. So to ensure that the build up is as it should be I have made her some advent bunting. I saw something similar in a magazine a couple of years ago and just made it up as I went along. The magazine photos were, of course, styled with fairy lights draped around the bunting and delicately positioned pieces of holly, mistletoe and fir branches. I had hoped to do something similar but it is cold, rainy and very very windy (so no greenery - I don't like getting cold and wet!) and the fairy lights are in a box right at the back of a very dirty and dusty garage.....

Les mademoiselles et petit garçon have though decided they would like something similar (rather than the hanging bags they had last year) so IF I have time to make another set of bunting and IF I get some greenery and IF I make it to the deepest depths of the garage I will treat you to a proper photo shoot!

In the meantime please just hum along to a Christmas Carol whilst you look at the following photos.....I am sure that will do the trick!


The bunting goes from 1 to 24 (of course).


Each bunting square is actually a little pochette to be filled with little gifts.


Now I just have to fill the pochettes!


Monday 15 November 2010

Enfin - le tuto pantalon

As promised, albeit belatedly, the tutorial for a very easy pair of trousers/jogging bottoms/pyjama bottoms. I blogged about the 'jeans' I made for petit garçon here and I have also used the same process to make pyjama bottoms (without the pockets).

Step One: find a pair of trousers that fit well


trousers to use as pattern


Step Two: Lay them backside down on top of the paper you want to use as pattern paper and then fold over so that the front sides are folded together.

lay trousers on pattern paper and fold


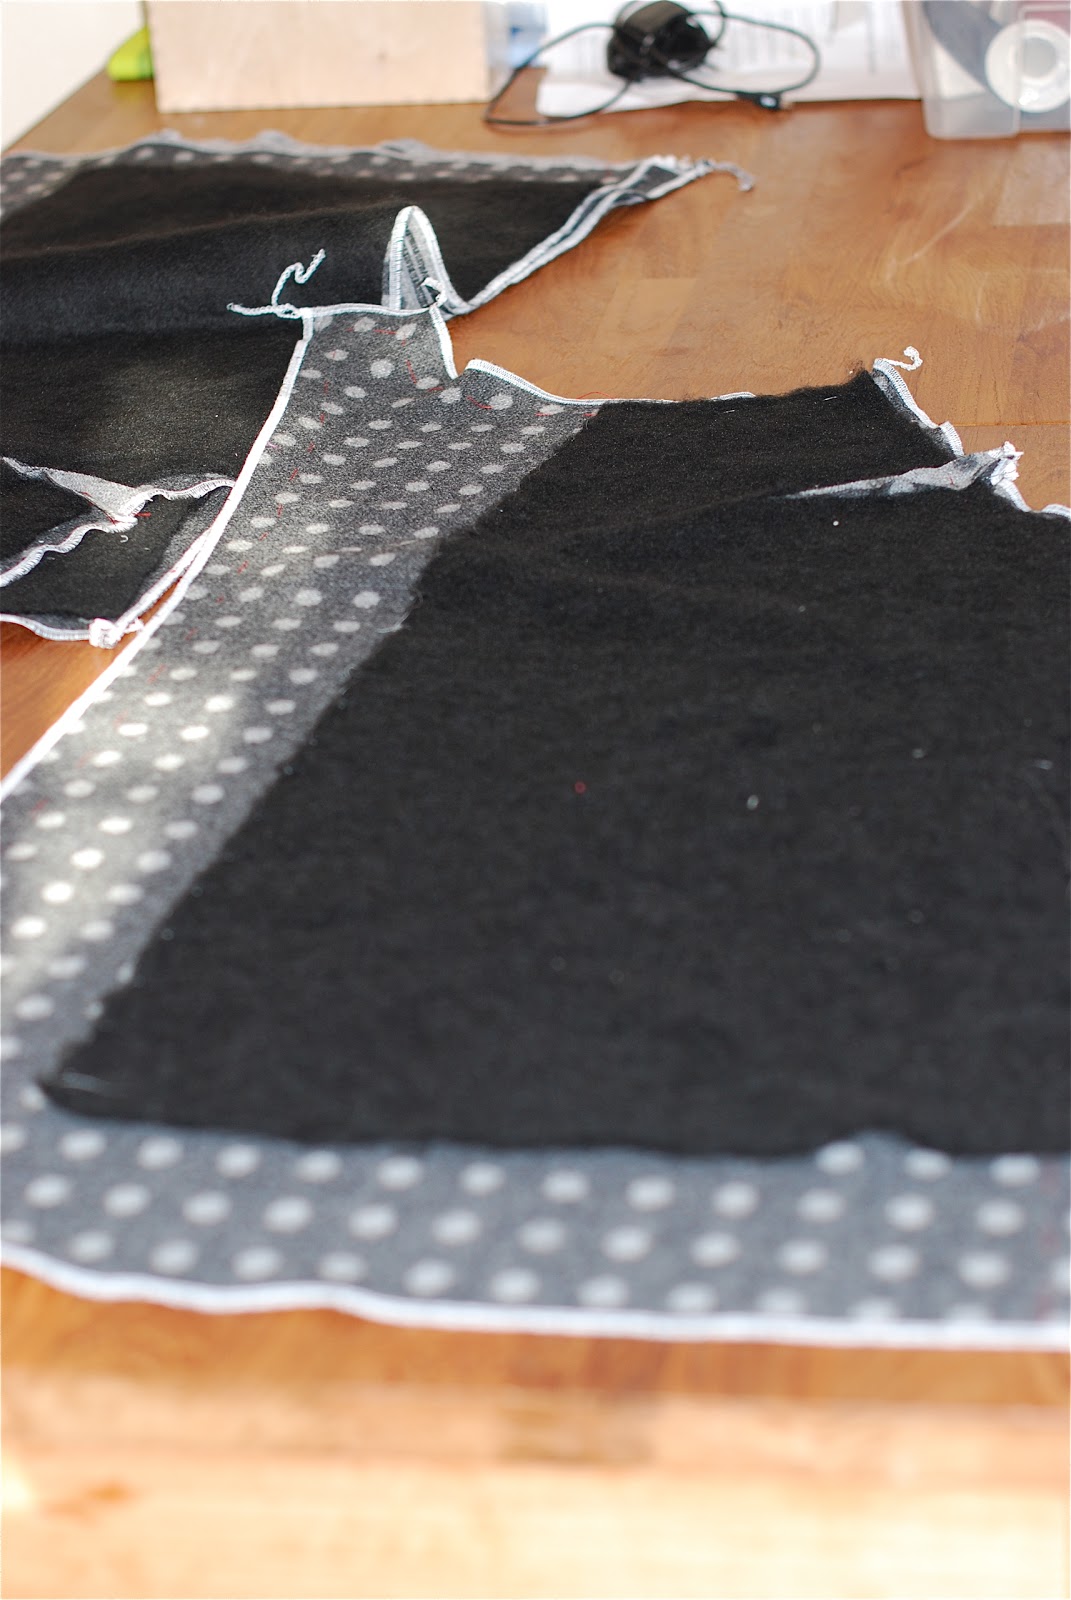
Step Three: Draw around the trousers - I tend to leave about 2 1/2 cm all the way round for seam allowance and ease - it is easy to take them in if they are too big but not so simple to let out if you have already cut them out.

draw round trousers to get pattern piece number one

Make sure at the top that you pull the waistband out, particularly if it is elasticated on the pair of trousers you are using as your pattern base, to get the correct width.


Step Four: Place your pattern piece on your chosen fabric.


If you want to make trousers WITHOUT pockets place the  long straight edge on the FOLD of the fabric and cut two of fabric - both on the fold.

If you are making trousers with pockets you should cut 4 of the basic pattern piece - or two doubled over but not on the fold.


Step Five (for pocket version only): If you are making trousers with pockets as per petit garçon's jeans you need to cut out a square for the back of the pockets

square for back of pocket

and the front inside part of the pocket as shown below

front inside of pocket

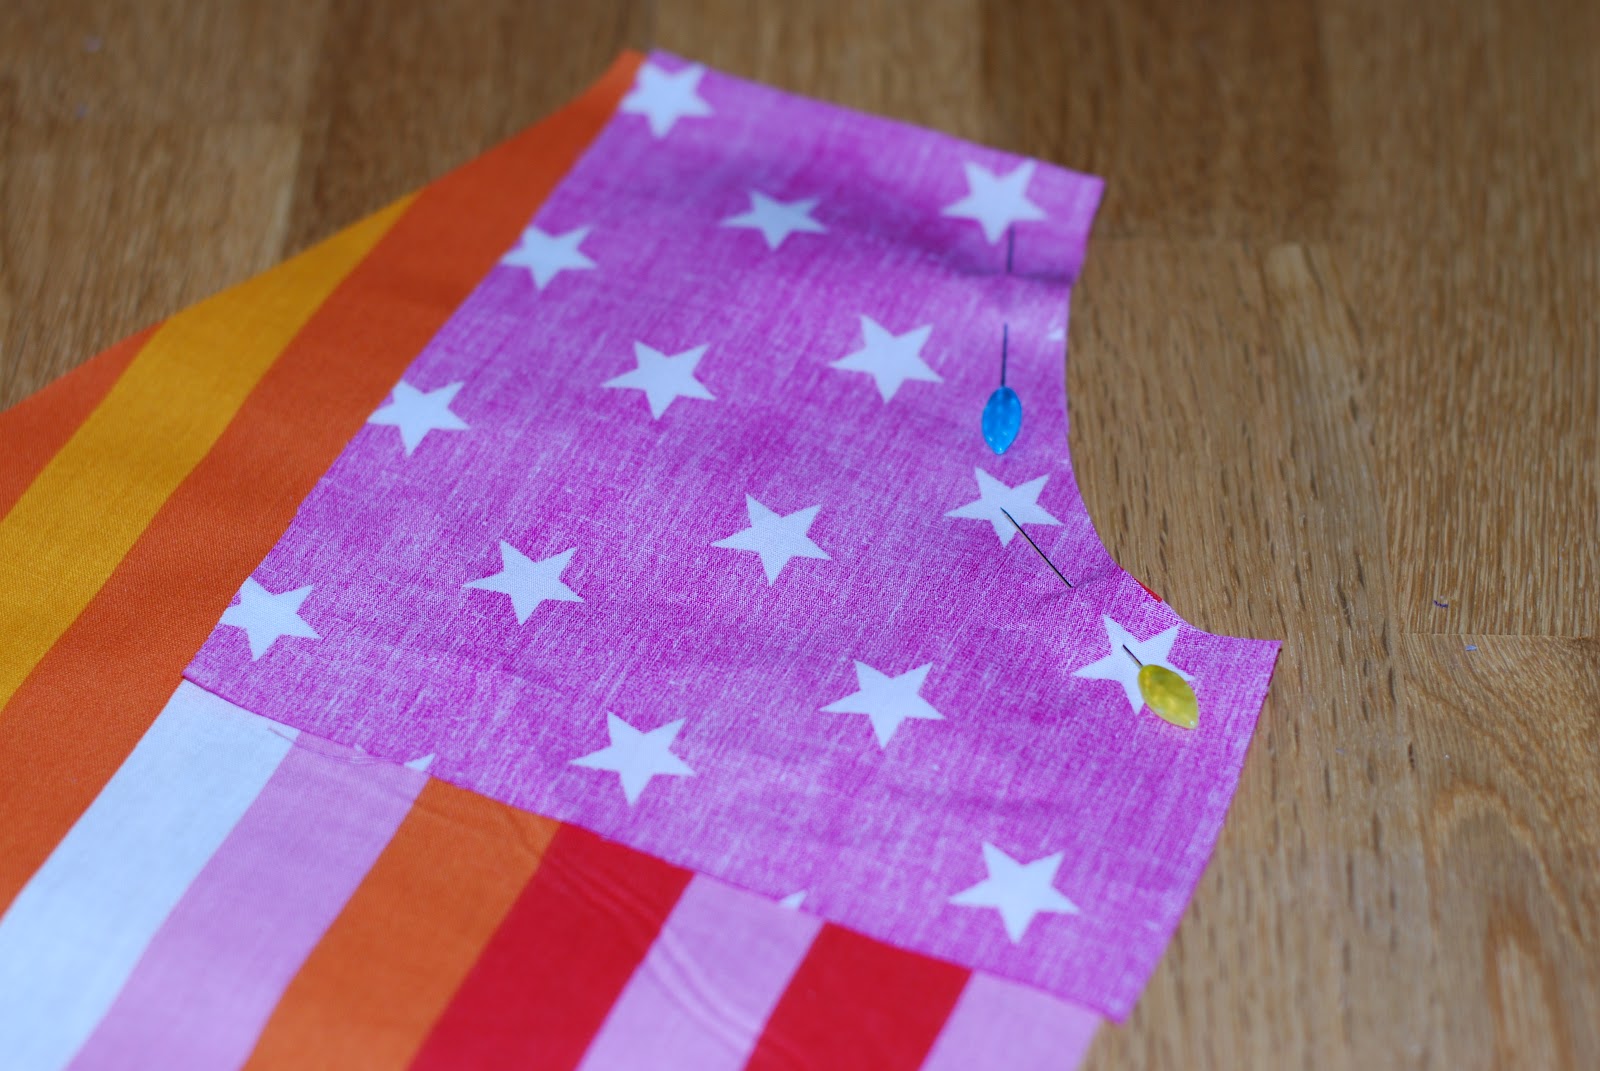
To find the size of the square and the front inside of pocket  go back to pattern piece one and mark on where you would like the pocket to go


You will see below I have marked the square for the back of the pocket in pins


and here, where the opening for the pocket will go which gives you the shape for the pattern piece for the front inside pocket


The two sections marked with pins above are the two extra pattern pieces you need to add the pockets.

Step Six (only for pocket version): Once you have cut the extra two pieces as set out in step 5 you should take the front inside pocket pattern piece and place it over two pieces cut out of pattern piece one (as cut out in step 4) - the pieces that you want to be the fronts of the trousers. You then need to cut away where the opening for the pocket will go - to match the inside pocket front piece. The other two pieces, which will be the backs of the trousers should be left as they are.


Step Seven: Cut out a waistband approximately 6 centimetres deep (or twice the width of your elastic plus 2 centimetres) and four times the width of the top of pattern piece one (before cutting away for the pocket opening) plus 4 centimetres.


Step Eight: To recap, before we start sewing, you should at this stage have the following (for the pocket version):
the pieces you should have
  1. two back trouser pieces
  2. two front trouser pieces (with the opening for the pocket cut out)
  3. one waistband
  4. two square backs of pockets; and
  5. two inside fronts of pockets
Step Nine: pin the inside fronts of pocket, right sides together to the front sections of pattern piece one (as shown below)


and sew them together.


Trim the seam allowance and clip into the curve so that when you turn the inside pocket section to the other side it will lie flat.


clip into the curve
Turn the inside pocket section to the inside and press.


Step Ten: Pin the square piece (the pocket back) to the inside front pocket section as shown, right sides together - taking care not to catch the front section of the trousers.


take care not to catch the front trouser section
 Sew around the sides that you have pinned (in the photo below that is the bottom two sides).

the back view of the pocket once sewn in

the front view
Step Eleven: Place the back section of the trousers and the front section together, right sides together, and sew the long straight seam.


Finish the seam, with an overlocker or pinking shears


And you will then have two sections like this:

front view

back view
Step Twelve: Place the two sections, right sides together as shown below 
 and pin the top two side sections - as shown by the three pins in the photo below.


Sew both side top sections.


and finish the seams


Step Thirteen: Pull on the centre seam in front of you and place the trousers so that they resemble trousers!


Step Fourteen: Pin up and down the inner leg seam and sew in one continuous seam.


Clip the seam in the crotch so that the trousers do not bunch when you turn them the right way round.


Step Fifteen: Attach the waistband to the top of the trousers right sides together


and sew to trouser top.


Step Sixteen: If using elastic, skip this step. I decided to make these trousers draw string waisted so on the inside of the waistband, just above the trouser top in the centre of the front I added a strip of fusible interfacing


and then made two small button holes, for the drawstring to come through.


I attached the drawstring to the centre back of the waistband.


Step Seventeen: Press a small hem allowance all the way round the top of the waistband and then fold over the drawstring and press again. If you are using elastic you should skip step 16 and just press the hem allowance down and then fold over the waistband and press. 


Step Eighteen: Pass the ends of the drawstring through the button holes and keeping the drawstring in the fold sew the waistband down, taking care not to catch the drawstring in your sewing (I pinned the drawstring high up in the fold to ensure it wouldn't get caught.

If you are using elastic sew the waistband down leaving a 5 cm gap through which you can pass your elastic. Attach one end of the elastic to a large safety pin and thread the elastic through the waistband. Pull the elastic through to the correct size, zigzag the ends together and then sew up the gap in the waistband.


Step Nineteen: Hem your trousers (I pressed up a small hem and then folded it over again and stitched round).


Step Twenty: Sew in your label (if you have one), pat yourself on the back, make yourself a cup of tea and


admire your work!


I hope this is clear - if you have any questions please leave in the comments below.

Happy sewing!